Activity: Moon phases and the moon base
Students model the Moon revolving around the Earth to understand why we see the phases of the Moon.
When we view the Full Moon, its brilliance dominates the night sky. This brightness varies with the Moon's 'phase' or apparent change of shape as the days go by. The phases of the Moon are caused by the Moon’s orbit about the Earth. The Moon's surface is dark and only reflects about 7% of the light it receives from the Sun. The Moon emits no light of its own.
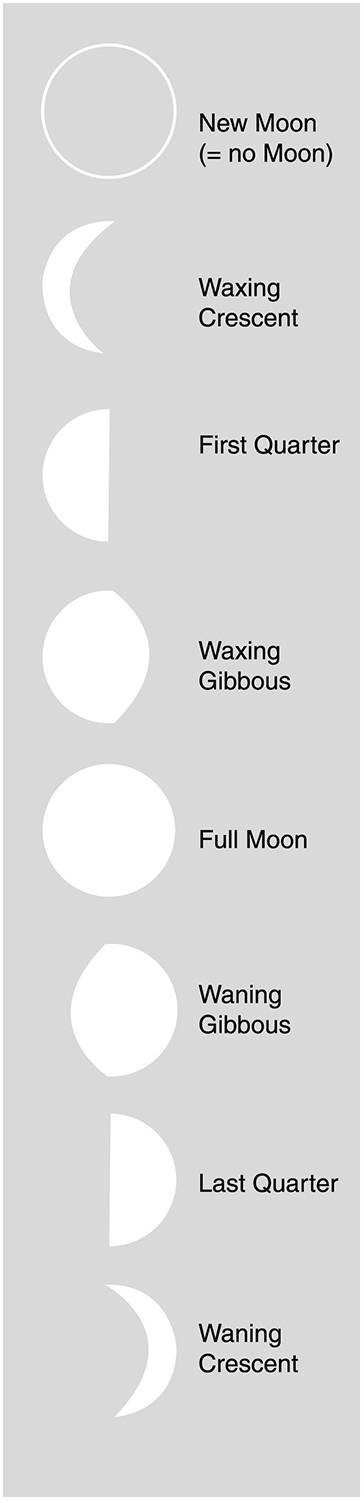
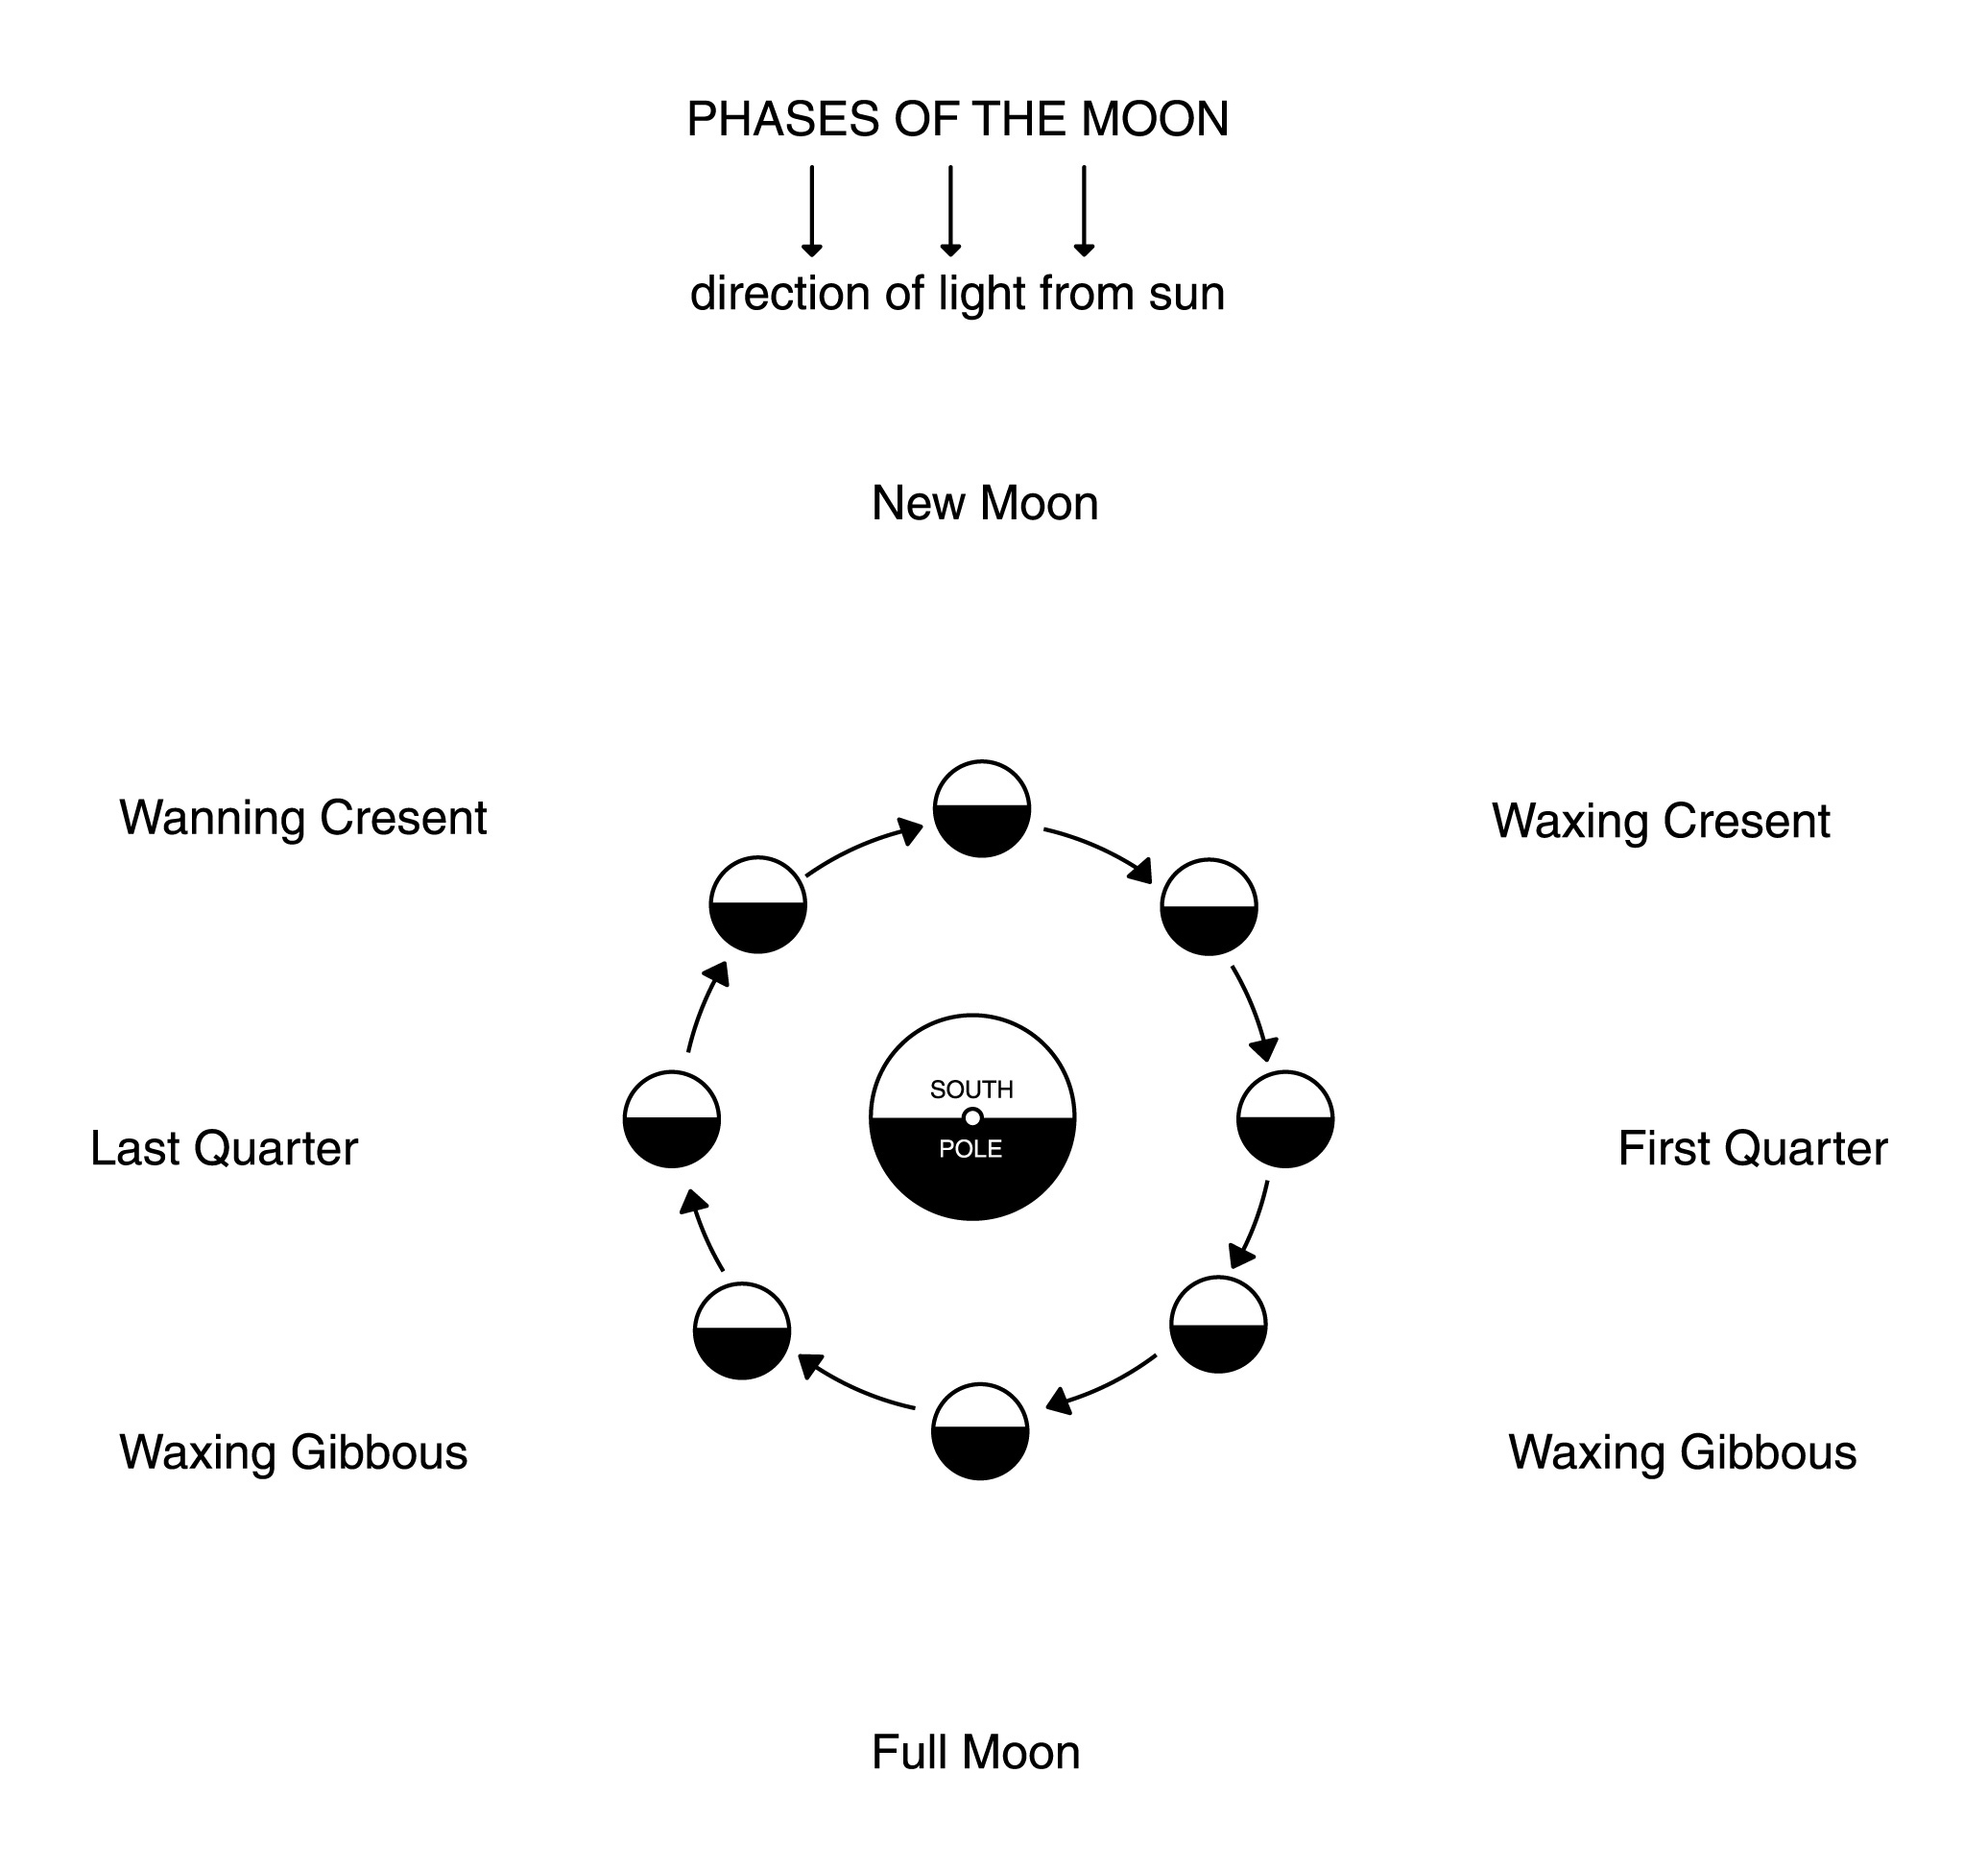
When observing the night sky we notice that the Moon goes through eight main phases over a month.
Phases of the Moon
Crescent Moon
The Moon is thin – from Last Quarter through New Moon to First Quarter.
Waxing Moon
The Moon appears to be growing – from New Moon through First Quarter to Full Moon.
Gibbous Moon
The Moon is fat – from First Quarter through Full Moon to Last Quarter.
Waning Moon
The Moon appears to be shrinking – from Full Moon, through Last Quarter to New Moon.
Model how we see the different phases of the Moon.
What you need
- an electric light, suspended from the ceiling or on a lamp stand (use a low wattage bulb, and, if possible, a low voltage power source)
- styrofoam balls (8 cm diameter is a good minimum size, but larger will be better)
- pencils to act as a handle
- a pin
What to do
- Skewer the foam balls onto the pencils so that the pencils act as handles. Place the lamp in the centre of the darkened room with about seven students in a circle around it.
- Have each student hold the foam ball in their right hand. Ask them to extend their arm in front of them so that the ball comes between their eyes and the lamp.
- Explain that the bulb represents the Sun, the ball represents the Moon and they are the Earth. The view they get models what they see of the Moon (from Earth) in the sky. Point out that the ball is reflecting light from the lamp and that it does not produce any light of its own.
- In the starting position the ‘Moon’ blocks the ‘Sun’. (This is actually demonstrating a total solar eclipse which is very rare for any given location on Earth.) Usually the Moon passes above or below the Sun as viewed from Earth, so have the students move their Moon up a bit so that they can also see the Sun. As they look up at their Moon they will only see its unlit side. This phase is called ‘New Moon’ (like no Moon).
- Ask the students to start sweeping their right arm back in a clockwise direction. By the 45˚ position they should see the left hand edge of the Moon illuminated as a crescent. The crescent will start out very thin and fatten up as the ‘Moon’ moves around the Earth. When their arms are out by their side the students will see the left half of the ‘Moon’ illuminated. This phase is called ‘First Quarter’. As they continue to move their arm around behind them the Moon goes into its ‘gibbous’ phase.
- Ask the students to turn their heads to view the Moon with their arm behind their back. The section of the Moon facing Earth is fully illuminated (unless the student’s head is causing a lunar eclipse). This is called the Full Moon.
- The students need to switch the pencil and ‘Moon’ to their left hand. They should hold the Moon behind them in the Full Moon position and move their left arm forward continuing the clockwise motion. They will view a gibbous Moon with the right portion of the Moon illuminated.
- Once their arm is straight out to their left side they will view the 'Last Quarter' Moon with the right side of the Moon illuminated. Continuing to move their arms in a clockwise direction the children will see a thinning crescent and a return to New Moon.
- Throughout the demonstration, point out that half the Moon is illuminated at all times and that it’s just our view of the Moon that changes as it moves around the Earth.
- Add a little fun by calling out a phase and see who can find the position in the ‘Moon’s’ orbit where that particular phase is visible or ask to see a gibbous Moon or a crescent Moon. You can add vocabulary like waxing gibbous Moon, waning crescent etc.
- Ask a student to role play the Moon orbiting the Earth in the same way described in steps 1-10. As the student does this, get another student to represent the Earth and film what the Moon looks like from this perspective. The footage should show the ball representing the Moon go through all of the phases.
- Film the motion of the Moon as it orbits the student representing the Earth from above so that you can see that the Moon is always half lit from this viewpoint.
We see the Moon’s different phases when looking at the Moon from Earth.
When looking at the Moon from Space, the Moon is always half lit by the Sun.
Challenge questions
- Think about how the Moon going through its phases will affect the moon base and life on the Moon during one month?
- Discuss this with your team members and add any relevant design features to your moon base.
Next activity