Student activity
Suitable for: Years 3 to 8
Learning areas: The arts, Science
Topics: Animals, Bugs
Students create their own scientific illustrations of the natural world.
Using the Biodiversity Heritage Library as reference material, students will consider how scientific illustrations help us see and understand the plants and animals that share our world.
They will then apply their own careful observation and drawing skills to accurately represent plants, animals, or other natural objects so they can better understand and explain what they see.
In this activity students will
- Watch video of a museum artist and explore the artist's practice.
- Explore a diverse range of artworks in the Biodiversity Heritage Library.
- Discuss visual artworks and the animal or plant represented.
- Use visual conventions, as shown in the Biodiversity Heritage Library, to create an illustration of something in the natural world.
Suggested questions to engage students
- What challenges do artists face in representing living creatures?
- How can artists accurately represent extinct animals in drawings?
- Some of the illustrations in the Biodiversity Heritage Library are very old. What can we learn from the first scientific descriptions of animals?
What to do
Watch the video of Peter Trussler and his art practice:
You may like to discuss with students:
- What animal was Peter drawing? Is the animal still alive today or extinct?
- What part of the animal did Peter have to draw
- What materials did he use to draw his images?
- Did he use colour? Why or why not?
- Why do you think he drew so many different angles of the skull of the animal?
- Did his image look real?
Next, look at the illustrations on the Biodiversity Heritage Library. You might like to show the images all together as a class or let students explore.
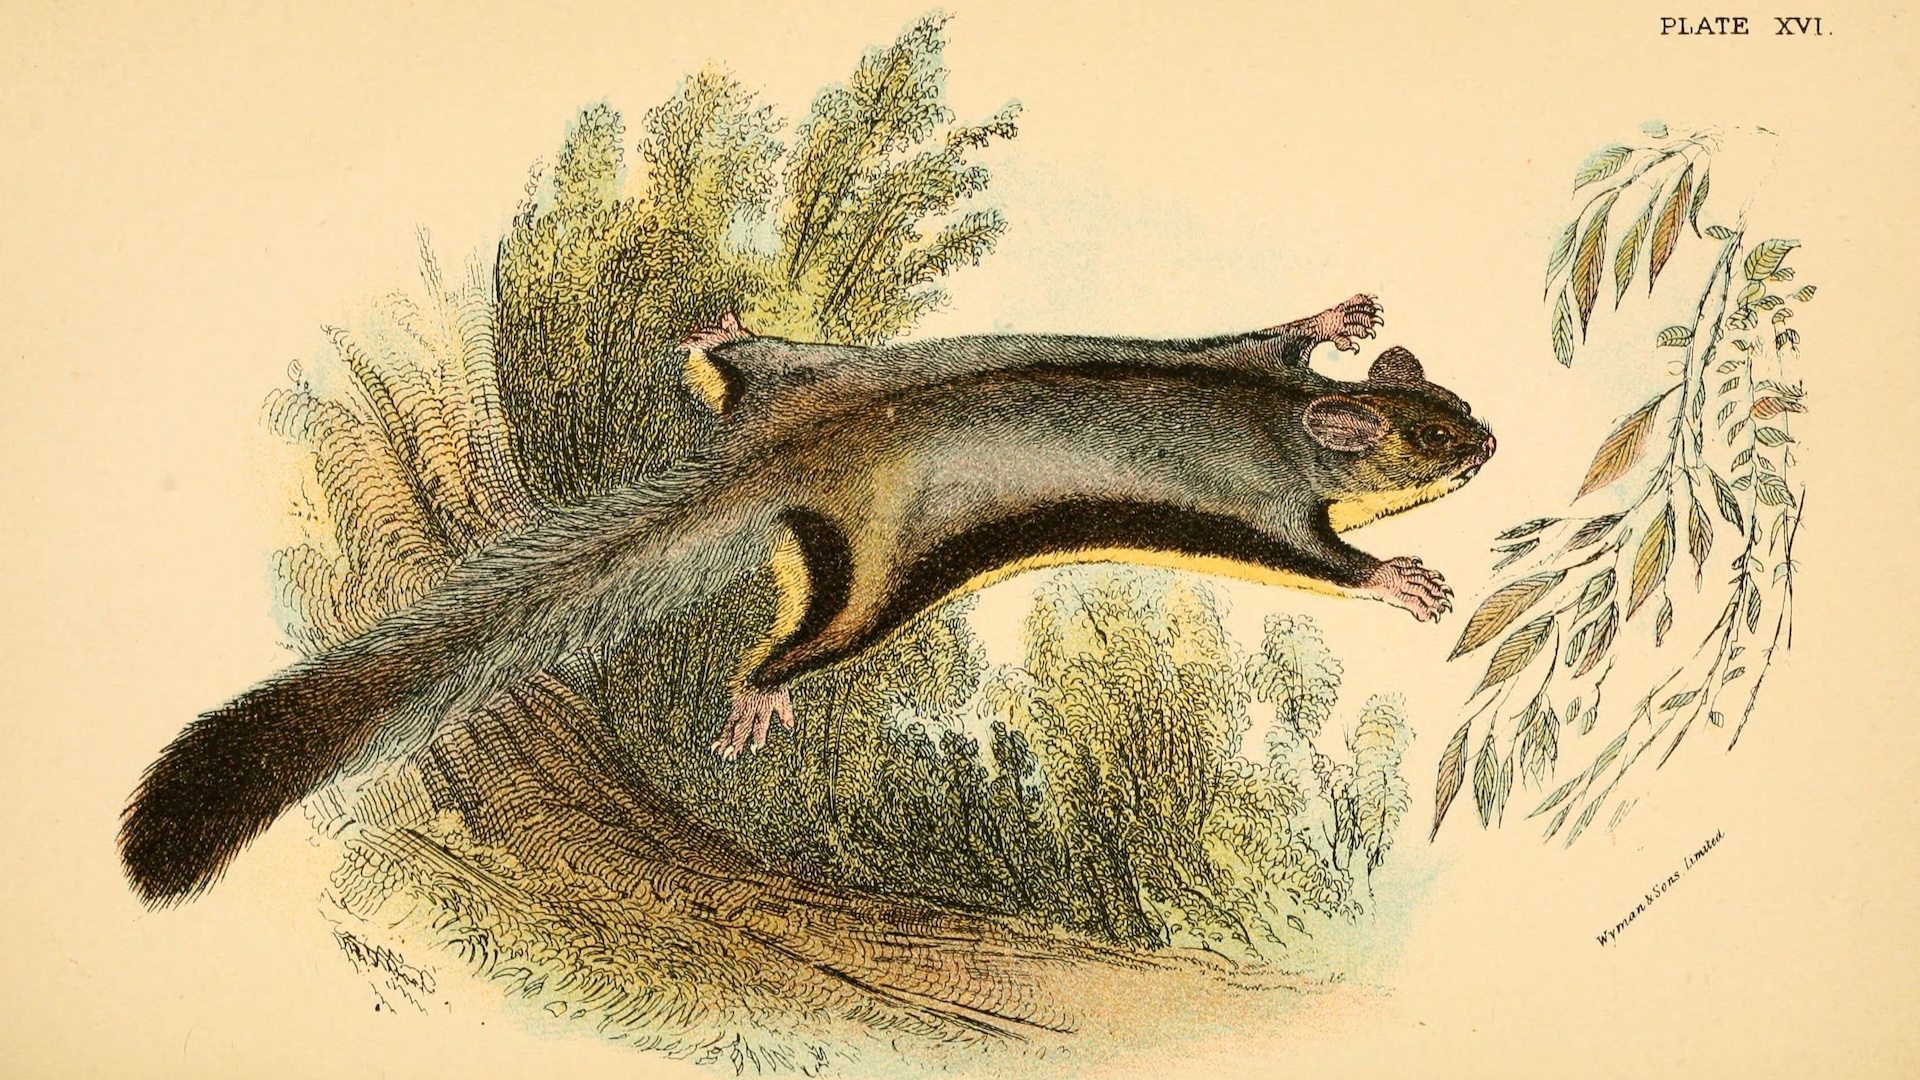
You may like to select an individual image and discuss:
- When was the image you are looking drawn?
- What is in the image?
- How many living things are on the page?
- Is it in colour or not?
- What angles of the living thing did the artist draw?
- Did they draw lots of detail of the living thing?
Activity
Students can now select their own specimen to draw.
Take students outside and instruct them to find something in the natural world to draw. A leaf, feather, flower or rock would be suitable selections.
Here are some tips to help students as they begin:
- Look before you draw. Spend some time just looking at your specimen. What do you notice? Do you need a magnifying glass to see if closer?
- Sharpen your pencil. It is best to start with a sharp pencil, so you can draw fine details of your specimen.
- Decide where you will start on the page. Will you cover the whole page? Will you draw different sides of your specimen? Will you need to add colour later?
- You may even like to add a scale on your illustration to give the viewer an idea of how big the original specimen is.
- Finally, label your scientific artwork. Write the name of your specimen, your name and the date you drew it, along with the location the specimen was found.
Victorian Curriculum Links
Visual Arts: Levels 3 and 4
Exploring
- explore and describe artworks, and why, when and how visual arts are created and/or presented across cultures, times, places and other contexts (VC2AVA4E01)
Developing practices
- develop visual arts practices by exploring and experimenting with visual conventions, visual arts processes and materials to create artworks (VC2AVA4D01)
Creating
- use visual conventions, visual arts processes and materials to create artworks that communicate ideas, perspectives and meaning (VC2AVA4C01)
Visual Arts: Levels 5 and 6
Exploring
- explore ways that visual conventions, visual arts processes and materials are used to communicate ideas, perspectives and meaning in visual arts practices across cultures, times, places and other contexts, including from Aboriginal and Torres Strait Islander Peoples (VC2AVA6E01)
Developing practices
- develop visual arts skills by experimenting with visual conventions, visual arts processes and materials (VC2AVA6D01)
Creating
- plan and create artworks using visual conventions, visual arts processes and materials to communicate ideas, perspectives and meaning (VC2AVA6C01)
Visual Arts: Levels 7 and 8
Exploring
- investigate ways that visual conventions, visual arts processes and materials are used to communicate ideas, perspectives and meaning in artworks created across cultures, times, places and other contexts (VC2AVA8E01)
Developing practices
- develop and refine skills in visual arts practices using visual conventions, visual arts processes and materials to create artworks (VC2AVA8D01)


Sign-up to Museum Teachers
Subscribe and get special offers, teacher news and free entry to all museums.