So you've got your objects and their stories, now what? Follow these basics to put together your museum or gallery setting.
Layout and design
First, consider the layout for your exhibition. You might like to group or order the elements of the exhibition accoring to both meaning and visual appeal. Is there a logical order to the display or will people wander freely? A scale drawing of the space can be useful in planning the position of each item.
Next think about how you can introduce the exhibition. An introductory panel can help draw visitors in and orient them in the exhibition space. You may want to choose a key image to use on the title wall or introductory panel, and perhaps also for the invitation, booklet, and publicity.
Digital images in exhibitions

You may want reprint photographs, to display as enlargements or to include on exhibition labels. For printing purposes, images will need to be high resolution images, at least 300-600 dpi, and ideally at least 1-2 MB.
Other digital content
Digital content, such as films, audio recordings, audio tours, interactive websites or apps can add extra depth and interactivity to exhibitions, and need not be expensive to incorporate.
Think carefully about which exhibition elements would work best as a screen based or audio experience, and which elements would work best as part of the physical display. You can use common audio and video software pagaes to produce digital content, but remember:
- Image and sound quality should be high.
- Copyright and image credits need to be included, as with other content.
- Avoid fancy transitions between images or segments, they can be distracting.
Tips for creating a short digital history can be found throughout our Making History resource.
Exhibition design tools
Once you are ready, it’s a good idea to mock up your exhibitions before installation. Roughly laying out items in position will help see how much material you can exhibit, and identify where you will need to cull items or any gaps that need addressing. Mocking up the exhibition first is safer for collection items, as you can avoid moving or repositioning items in a rush while installing.
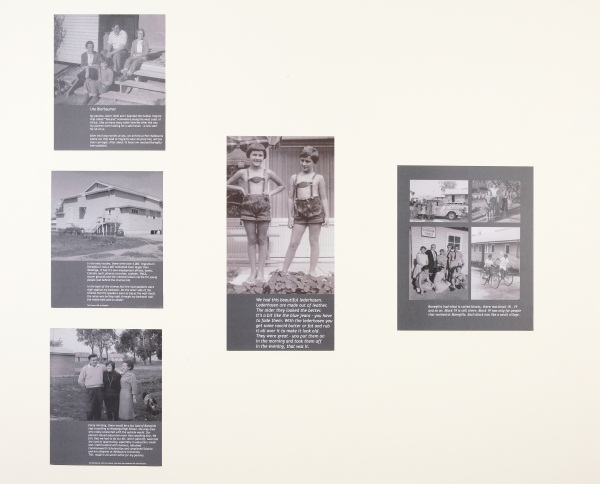
If you have the items at hand, you can set them up in groups to see how they work together. For framed images, try lining them up against a wall to check how they look.
Displaying your items
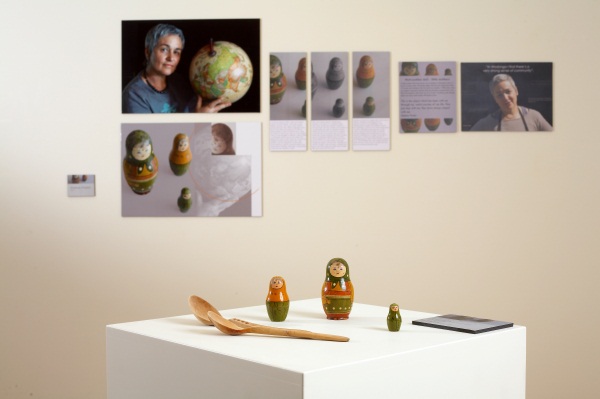
There are a few ways you can show off your items effectively. If you use cases, plinths, pedestals or partitions, these should be stable, neat and clean, and suited to the objects on display.
Think about how their position will influence where people walk as they visit your exhibition. Make sure the items a re well lit, and the display is insect and rodent proof. If painting use low VOC water based paints, and air the cases for several weeks.
Mylar (inert plastic) can be cut to size to provide a barrier underneath sensitive display items, to protect them from dye transfer or other damage from fabric or painted surfaces.
Some items will need supporting mounts (for example book cradles). Raising selected items can also highlight them, and provide more visual interest, particularly if there is a lot of unfilled vertical space within the exhibition cabinet.
Some options for mounting your object can include:
- Perspex ‘risers’ available from shop supply shops.
- Custom made supports, made from acid free board, with acid free tape or hot glue.
- Painted or fabric wrapped wooden blocks.
- Items can be secured using wire wrapped in silicone tubing, or with museum wax (for example at the bottom of a vase).
Attaching items to the wall
Lightweight information (graphics, diagrams etc) can be fixed to walls with Velcro adhesive patches. Paintings and other framed images should hang from D rings attached to two sturdy picture hooks firmly fixed to the wall, or from two wires suspended from a picture rail.
Avoid presenting items or text below 90cm or more than 200cm from floor level. Many galleries set the ‘eye level’ for hanging pictures at 155cm above floor level, but you will need to consider the ideal position for your audience.
Labels

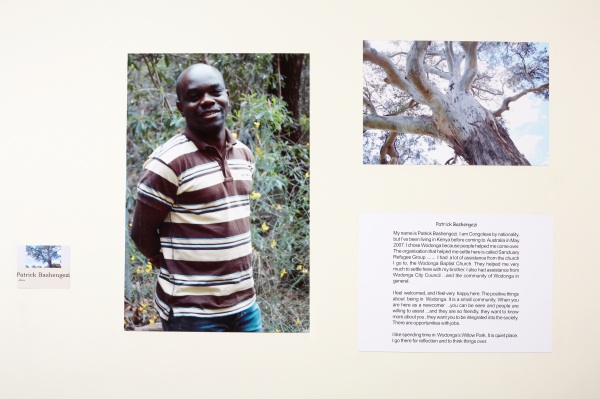
Every item should be clearly identified with a label. Your label text should be very concise, but conversational in tone. For example, first person quotes are often engaging. Try to avoid jargon and specialist or abbreviated terms.
Your labels may include:
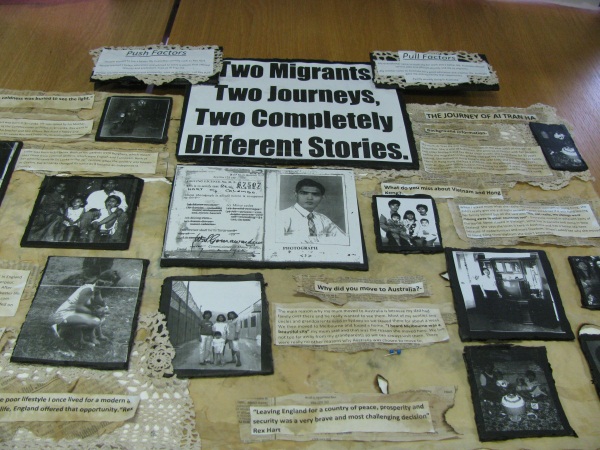
- A title panel shows the name of exhibition. The title sets the tone through words, colour and font. Approx. 400pt (10cm high).
- An introductory panel intrigues and outlines what exhibition is about. Approx. 200pt (5cm high), 50-150 words.
- Thematic text panels contain story or context for specific parts of the exhibition. Approx. 36pt (1cm high) 50-150 words
- Object labels explain what a particular item is and when it was made. Approx. 18-22 pt., 15-25 words
- Extended labels can present story/context for highlighted items as well as explaining what an item is. Approx. 24pt, 50-100 words
- Consider also if you need an acknowledgement panel, instructions for interactives or general signage (e.g. emergency exits / do not touch), as these also form part of the overall look.
Tips for label design and placement
Labels should use a clear ‘sans serif’ font such as Helvetica, Geneva or Arial, with a font size of at least 18-22 points. 12-point text is common for written documents but is much too small for an exhibition setting. Extended spacing between lines can make text easier to read. Black text on a white background is the most readable for most people.
You can create your own template labels in Word. Set a border with a pale grey line as a cutting guide, and set generous margins. The object name should be in bold. A standard size for a basic label for an individual item is around 15 wide and at least 10 cm high, with 1.5 cm or wider margin.
Place labels in consistent positions wherever possible, for example on the right side of item, bottom edge one metre from floor level. Small groups of items could be described on one label. To make it easy to see at a glance which label goes with which item you can use numbers, or visual cues such as images or outlines of shapes of items.
Lighting

Consider lighting early in exhibition development as it makes a huge difference to the experience of your visitors.
It is always best to light works that are hanging on walls from an angle, positioning spotlights so that they pan over several exhibits.
No exhibit should be placed where it is in direct sunlight at any time of the day, this is particularly important for fabric, paintings, drawings, prints or original photographs. Any windows near exhibits should be being blocked out or fitted with UV filtering screens for the duration of the exhibition.
Temperature
The AICCM recommended Interim temperature and relative humidity guidelines for acceptable storage and display conditions of general collection material are:
- Temperature – between 15–25°C with allowable fluctuations of +/-4°C per 24 hr.
- Relative Humidity – between 45-55% with an allowable fluctuation of +/- 5% per 24 hr.
- No exhibits should be placed close to or over radiators, heaters or heating ducts.
- Ensure that exhibits are not placed near hot lights or electrical equipment.
Permission to reproduce creative content
Before re-using images, artworks, literature, dramatic works, or music, you will need to check if they are in copyright. Even if the item belongs to you, the creator may still hold copyright.
Many copyrights holders are happy to provide permission for museums and galleries to reproduce their work, though professional artists and collecting organisations may charge fees, in which case you will need to plan ahead, as it can take weeks for an organisation to process a license request.
Content licensing is always for a specific purpose (e.g. online for 5 years, print run in Australia of 1000 copies) so be clear what you intend to use it for, and include all planned uses in your request, so that you don’t need to go back for permission to re-use the content, e.g. to use a photograph to advertise the exhibition on Facebook.
Create a spreadsheet to track the process of seeking copyright and other relevant permissions so that you can easily see where you are up to, and how to recontact the permission provider if needed.
You can also reproduce content that is out of copyright, or that has been shared online with a content sharing license such as a Creative Commons license.