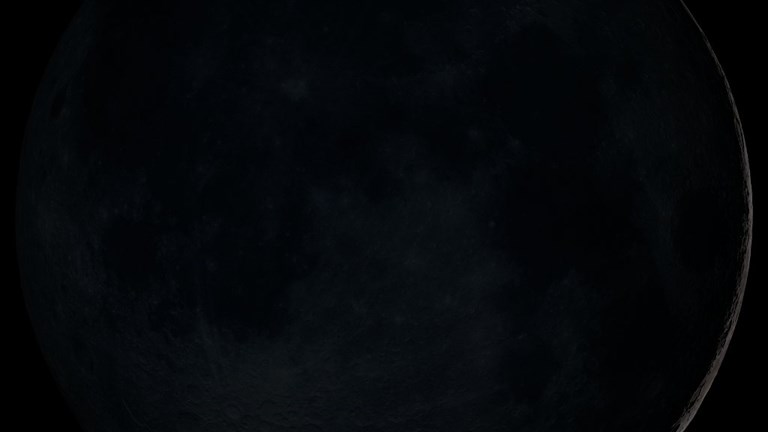
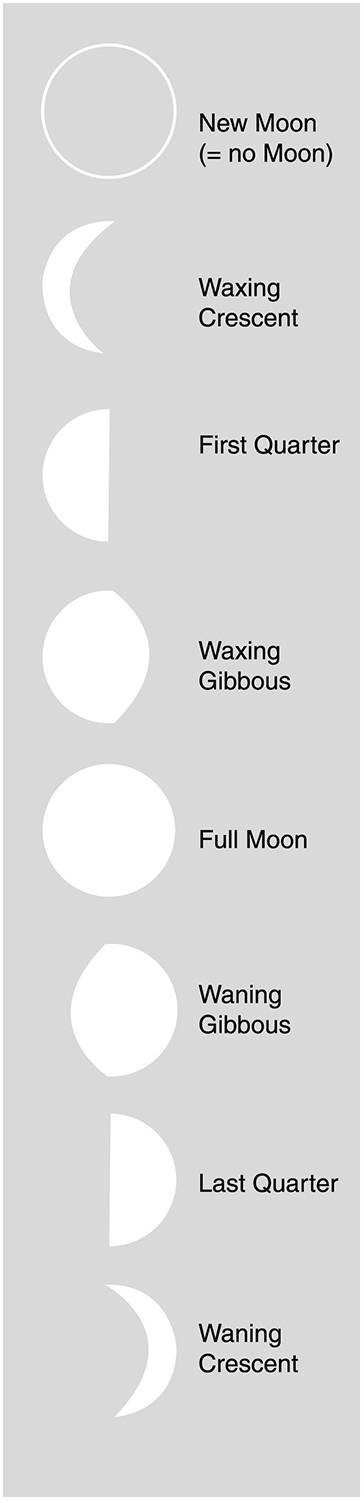
Activities for Tycho to the Moon

Moon watch

Observing the Moon is an excellent way to begin an interest in astronomy. The images below show what the Moon looks like in the different phases and indicates when it can be seen during the daytime and night time. The direction in which to look for the Moon is also indicated; the Moon rises in the east and sets in the west.

Macro image of the moon

New Moon

The New Moon is visible in the daytime sky, but difficult to see (none of the lit side is facing us). The new moon is not visible in the night sky.

Rise: Sunrise |  Set: Sunset
Macro image of the moon

First Quarter

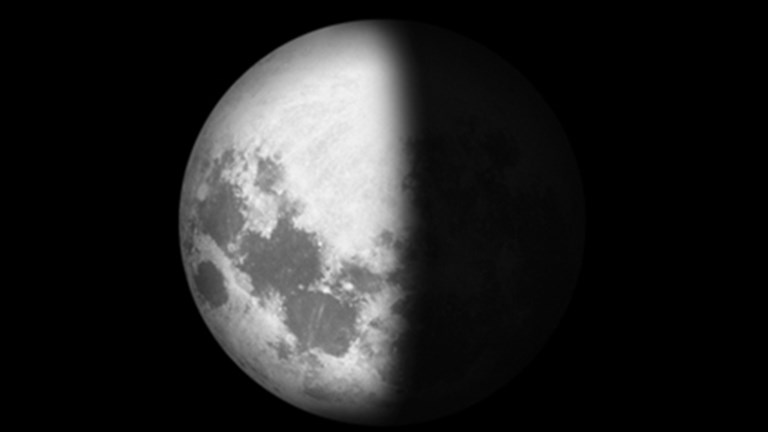
The First Quarter Moon is visible in the afternoon in the eastern sky and in the evening in the western sky.

Rise: Midday | Set: Midnight
Macro image of the moon

Full Moon

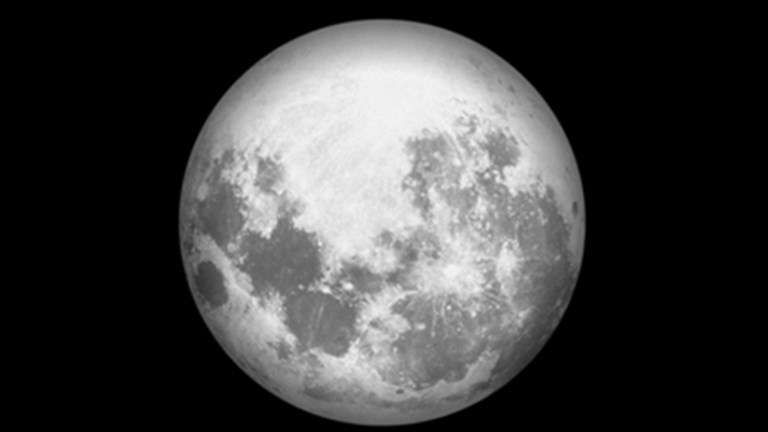
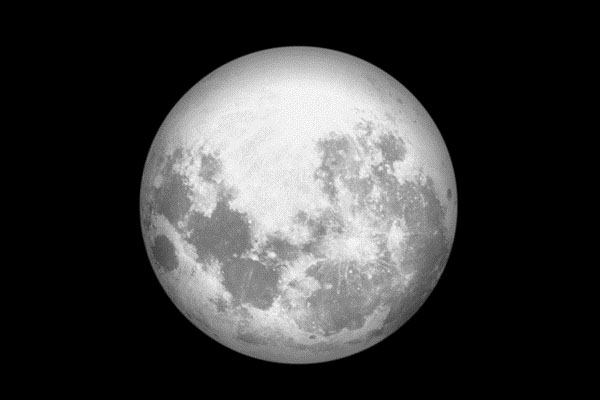
The Full Moon is not visible in the daytime sky. It appears in the east at sunset and is visible in the night sky.

Rise: Sunset | Set: Sunrise
Macro image of the moon

Last Quarter

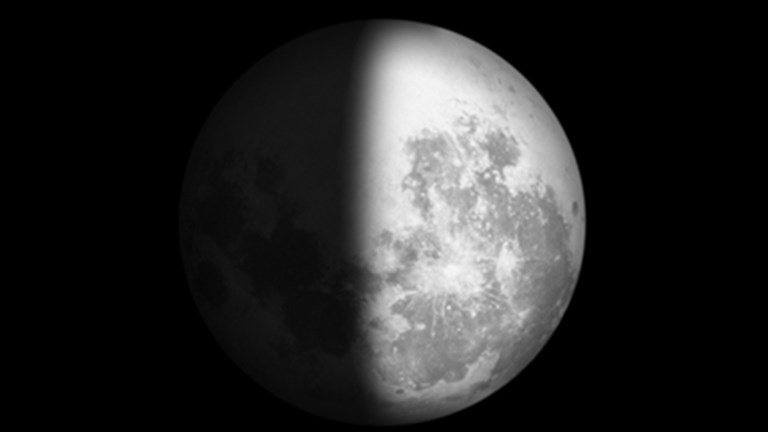
In the Last Quarter the Moon is visible in the early morning in the eastern sky and later in the morning in the western sky.

Rise: Midnight | Set: Midday


Phases of the Moon
Phases of the Moon

The current phase of the Moon for Australia can be found on many websites. A Moon calendar is available online from the Calendar- Australia website.

Introducing the Moon to the students

Ask the students to:

  • In groups of three or four, write down all the things they know about the Moon.
  • Watch the video called Moon and Stars.
  • Observe the Moon over a month and record what they observe by drawing what the Moon looks like every day and night on the Moon watch worksheet. Photocopy multiple copies so they can observe the Moon over a month. After a month, ask them to answer the questions on the worksheet.
Find a story book that will help the students learn more about the Moon and read it for them in class.

After reading the story, ask them to get into the same groups they were in for question one and ask the students to write down at least three more things they didn’t know about the Moon before the story was read to them and add these facts to the list they created in Question one.

Moon watch worksheet

Look for the Moon during the day and night. Write down the time that you see it. What part of the sky was the Moon in when you saw it? Is the location up high in the sky or low down?

  1. Colour the picture of the Moon so it looks like the view you see.
  2. Describe the pattern that the shadow on the Moon makes over the month?

Watch: Moon and stars

Dr Tanya Hill, astronomer, explains changes in the sky and the star patterns.

Design project: Design your own Moon book

In this project, you will be designing your own story book about the Moon. The book will be a creative story that another student, your age will enjoy. The book must also teach other students about the Moon.

Here are some questions that will start you thinking about your design:

  1. Collect all the facts you know about the Moon that you have learned about that you might want to include in your book.
  2. Think about what the story will be about?
  3. How many characters will there be?
  4. Who will be the main character(s)?
  5. How will the story begin?
  6. How will it end?
  7. How many pages will it have?

What to do

  • When you have answered all the questions, write a draft of the story with pictures.
  • When you have finished, ask one or two students in your class to read your draft and then make suggestions on how you can improve your book.
  • Make any changes to your book to make it better.
  • Now, design your book with pictures. You may want to use a computer to type your book and draw your pictures or just use paper and colour pencils and cardboard.
  • When you have finished, share your book with others in your class and read books your class mates have designed.

Day and night

Discuss what happens during the day and night with the students.

  • How do you know it is daytime? What sorts of things do you do during the daytime?
  • How do you know it is night time? What sorts of things do you do at night time?

Ask the students to watch this video: Day and Night

Ask the students to complete the People Shadows activity below.

People shadows activity

Background information

Our own shadows are created when our body blocks sunlight. Since the Sun appears to move across the sky during the day, our shadows change shape. The time of day when shadows are shortest is when the Sun is due north. Shadows of people almost disappear when the Sun is directly overhead – the only shadow is directly beneath them. In Melbourne the Sun is never directly overhead. The only areas of Australia that have the Sun directly overhead during the summer are north of the Tropic of Capricorn.

Always ensure that students are warned never to look directly at the Sun.

What you need

Coloured chalk

What to do

  1. Go outside to an open asphalt/concrete area early in the morning. Work in pairs. Take turns to stand in a scarecrow position while your partner traces around your shadow using coloured chalk. Now swap over.
  2. Place a sign requesting that no-one rubs off the chalk during the day.
  3. Return to the same position before lunch, at lunchtime, and again in the afternoon. Each time stand in the same position and use a different coloured piece of chalk to trace the shadows. Label the different coloured shadows to indicate which shadows were cast in the morning, at lunchtime and in the afternoon.
  4. Discuss what happened to the shadows and list any suggestions you have to explain their different size and direction.
  5. You could repeat this exercise at other times of the year e.g. March, June, September and December. Discuss your results.

Design project: Design your own nocturnal animal

Discuss who is awake at night time? Are any animals awake at night time? What special features do these animals have to help them survive and be awake at night time? We call these animals nocturnal animals. Find out about three nocturnal animals. Using what you learned, design your own nocturnal animal and answer the following questions:

  • What will your animal be called?
  • What would it look like?
  • What colour will it be?
  • What will it eat? What is there to eat at night?
  • Where will it live?
  • What can it use as shelter at night?
  • How will it move around to find food?

What to do

  1. Draw a diagram of your creative nocturnal animal
  2. Now make a model of your nocturnal animal using recyclable materials or lollies!
  3. What I learned after doing this project?

Night time activity: Pictures in the sky

Background information

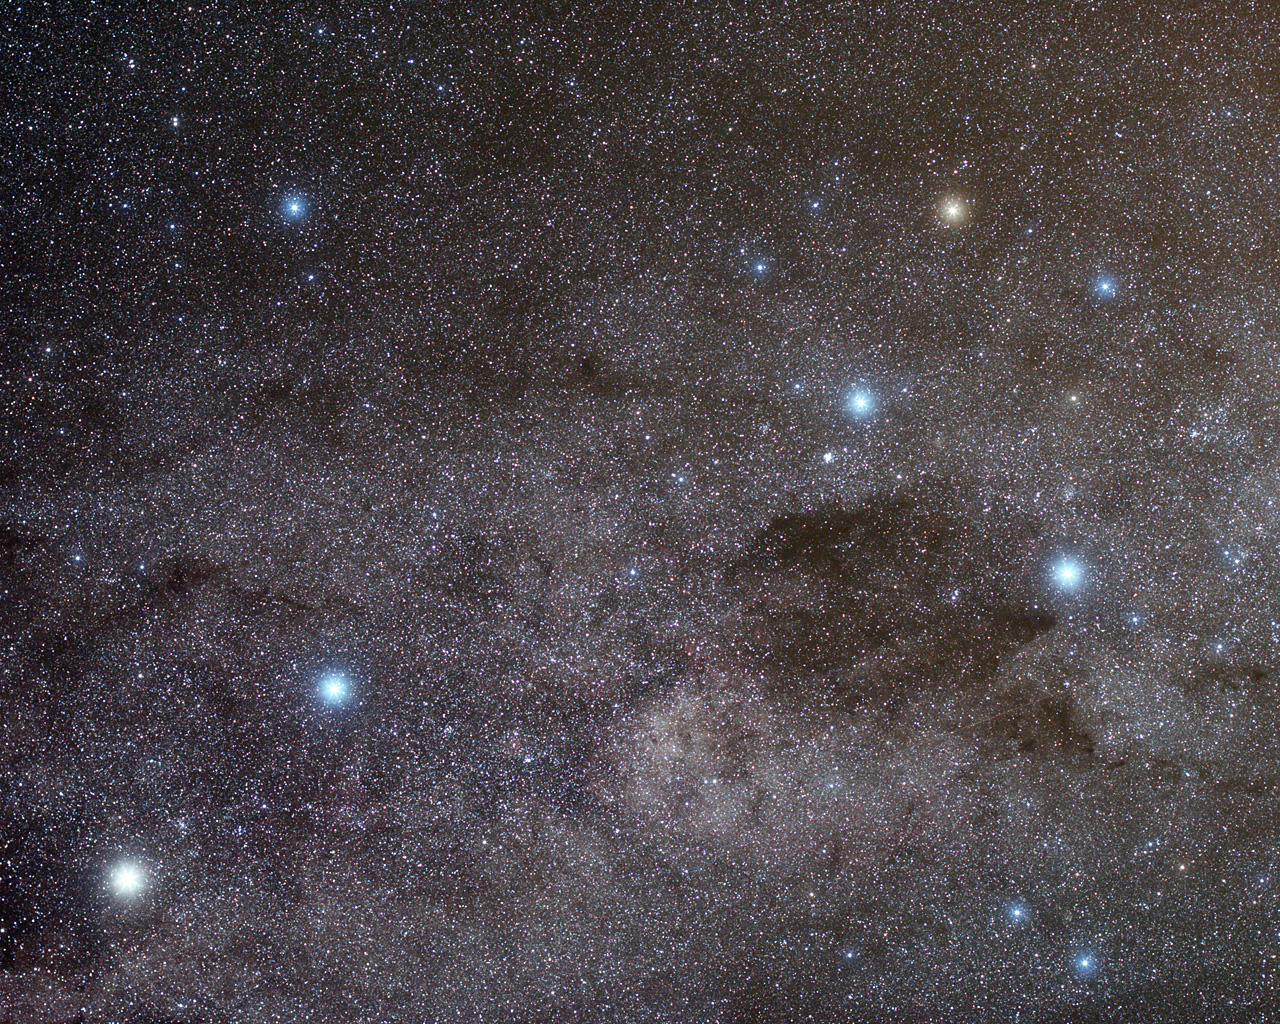
People have been seeing pictures in the sky for thousands of years. Astronomers now divide the sky into 88 constellations or sections. In each constellation (or part of the sky), the brightest stars stand out. When using your imaginations, bright stars can be joined together to form shapes or pictures, just like a dot-to-dot puzzle. The picture that is formed by the brightest stars becomes the name of the constellation. For example, the best known constellation in Australia is Crux or the Southern Cross. The bright stars in that area of sky form the shape of a cross. Crux is also the smallest constellation in the sky because it covers the least amount of sky.

Aboriginal groups all over Australia have a rich heritage of stories based on the stars and shapes in the sky that include emus, sharks, stingrays and fish. One story of the emu incorporates dark patches in the southern Milky Way from the Southern Cross to Scorpius. The Pointers are not part of the Southern Cross (Crux) constellation but belong to the constellation Centaurus (a mythical beast that is half man and half horse).

As a rule of thumb, the constellation of Orion can be seen during summer evenings and Scorpius during winter evenings. It is found low in the eastern sky in the evening from December, it sits overhead throughout February and becomes low in the western sky by April.

The constellation of Scorpius is visible low in the eastern sky in the evening from May, appears overhead during August and sinks low in the western sky by November.

The two constellations appear in opposite parts of the sky and at certain times one can be seen rising as the other one sets. One myth states that Orion was killed by the poisonous sting of the scorpion, which is why Orion now keeps out of Scorpius' way.

What you need

  • Copies of worksheet Constellations in a cup
  • Polystyrene cups
  • Skewers
  • Scissors
  • Paste
  • Torches (one per pair)
  • Access to darkened room

What to do

  1. Make sure each student has a polystyrene cup, a skewer and a photocopy of the worksheet Constellations in a cup.
  2. Cut out the cup constellation of Orion (for December - April) or the cup constellation of Scorpius (for May - November) or either for spring and autumn. Paste the constellation, face up, onto the inside bottom of the cup. 
  3. Make small holes where the dots are by carefully pushing a pin or skewer through the dots one at a time. Make larger holes in the positions where there are larger dots (representing brighter stars). If it is difficult to put the holes in the cup from the inside, you can put the holes into the circle of paper before you paste it onto the cup. Then paste your constellation onto the bottom of the cup (outside) face down. Poke the holes into the cup by using the holes you have already made in the circle of paper as a guide.
  4. The cups are now ready to be tested to see if the constellation can be seen.
  5. Darken a room or area that has a clear wall. Put the torch in the cup and shine it onto the wall. The constellation should appear as dots of light on the wall. For best results the cup (with the torch inside) needs to be quite close to the wall.
  6. The darkened room simulates night and when the room lights are turned on it represents day. Discuss what happens to the constellations when the light comes on even if the students keep their torches on.
  7. Ask the children why the stars seem to disappear.
  8. Encourage the children to look for their cup constellation in the evening sky.
Photograph of the night sky
This image depicts some of the brightest stars of the southern sky: on the right, in a rhomboidal shape reminding that of a kite, are the four stars of the constellation Crux, the Southern cross; in the lower left part, instead, shine the two most brilliant stars of the constellation Centaurus, the Centaur.
Source: ESOCredit: Y. Beletsky

Join the mailing list and get the latest from our Museums direct to your inbox.

Share your thoughts to WIN

We'd love to hear about your experience with our website. Our survey takes less than 10 minutes and entries go in a draw to win a $100 gift voucher at our online store!